Wednesday, December 28, 2011

Valentines Ribbon Board

So I saw this wonderful book paper Christmas tree at a Christmas Boutique I did this month. I thought to myself, "OMG that is such a wonderful idea!!" All the craftiness inside me started gushing and I knew what I was going to do!

I found a very old picture frame and decided to make a ribbon board with it! It could be used for notes or hair clips, or whatever you would think! I use them for pictures and recipes and bills. Works very well.

You will start with:
Book pages, glue, razor and measuring device!
Take you pages and cut them to the width you are looking to use. I decided to cut mine using two different widths. I figured that would work for the entire picture frame.


Once you cut the strips, fold and glue them. I stuck them under the book to hold them together while the glue dried. You can see that to the right.

Once all my paper was folded I went and applied primer to the picture frame and then spray painted it red! So glad hubby doesn't yell anymore about the spray paint on the lawn!

While the paint dried I made these corner pieces. They came out pretty cute.

I took the corner pieces and hooked and glued them to the corner's of the frame. Then the process of gluing commenced!

Once I finished gluing all the paper page pieces I found a lovely piece of rope and glued it around the frame. It gave it a nice pop!


Then I took a piece of cardboard and glued a piece of fabric to it.  Then I attached ribbon and jewels to turn it into a robbon board! I LOVE how it came out!


Love it! Make sure you link up your own Valentine's Day Project!

Friday, December 2, 2011

Damask Coasters

I just LOVE how they came out. This was my first attempt at decoupage! I used some of my scrap scrapbook paper. The tiles I picked up from I Love To Create (yes I live like 5 blocks from the factory). I used the Matte Modge Podge. Thanks to a great friend I didn't relized I needed to seal it. I used some spray sealer I had for my ceramics.

Looks wonderful with out new table. No, the Nightmare Before Christmas mug is not for sale. :)

Tuesday, November 29, 2011

100 Followers

I would love to hit 100 followers by the end of December. If you can help me get there, I will pick 10 followers who get a free owl!

This will be a great way to receive free gifts! Shouts out to your friends and show some love!

Sunday, November 27, 2011

Bread Box Conversion

Have you ever seen something in a store or yard sale and you immediately knew what you wanted to do with it, and how you wanted it to look? Very rarely this happens to me. Usually I buy it and take it home and contemplate for awhile on how to make it "better". However, I found this wonderful old fashion bread box and once my eyes connected with it, I knew exactly what I wanted it to look like!


$15 at local thrift store
 After loading it up and bringing it home, my husband rolled his eyes and said something to the fact of, "Is this going to sit in the garage like all those pallets that you wanted to 'Make cute'?" I promised I would start on in that weekend and so I did!

First, I removed those very beautiful glass pieces and cleaned them up. I listed them in my etsy store so that someone else can re-purpose them into something 'better'.


 After taking the glass out it looked so bare. I figured I couldn't stop there, so I removed the hinges and knobs and got it ready to be sanded down.  This box was so old, and the pine was so soft, I took my time sanding it down. I am very glad I had a electric sander!


 Once sanded, I cleaned off all the wood. Then I used primer that hides knots. I tried it with another type of primer first and within a day the knots would show through. Once the primer was on I went and put putty on all the nicks and dings around the body of the box.


 After getting that done I started painting! Oh my goodness! Talk about coming together! My little heart was beating as I saw my vision coming together.
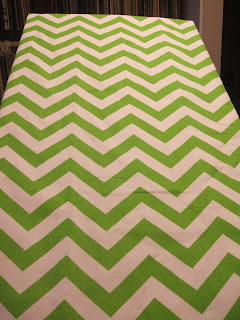
It took many, many coats of paint. This box just sucked that paint up. Once all the paint was dry I needed the fabric for the back of the box. I knew I wanted the Chartreuse Chevron fabric. The only place I could find it for a decent price was www.fabric.com. So I got it. I am a very thrifty person, so when I spent over $10 for one yard of fabric and shipping, I almost cried. I knew though, I wanted it to look exactly like I envisioned it.

The wood piece on the back was very warped. I took it to Lowes and had them cut me a new piece of wood to fit the back. Once I got the wood and fabric, I taped the fabric on it to make sure it was lined up properly. Then with my staple gun I stapled it all down and on to the bread box!

My vision coming true!
I found these wonderful knobs on etsy! They are in a cute little shop called LaBellas Cottage. I searched for many hours for the right knobs and once I saw them, I knew they were it!

I put on my doors and hinges and knobs and stood back and looked at my wonderful piece of art. I could not believe that I made it exactly like I saw it in my head. My husband was even impressed with how well I did and how much work it took. He didn't even yell at me for the spray paint on the lawn!!

This shows you, even a first timer can make something 'better'. :)

Sunday, November 20, 2011

AND THE WINNER IS......

Please email me at: reneelatour81@gmail.com

I will mail it on Monday with all my other shipments!

CONGRATULATIONS!!

Saturday, November 12, 2011

I Heart Toffee

Many years ago I learned to make toffee. I always thought it was the hardest thing in the world to make. How wrong I was! I love making it, and have not made any in years. So today me and my side kick (with awesome fingerless gloves we got at a craft show this morning, accompanying a totally rad beanie we got as well) decided to make some.

Here is the recipe. It makes about 1 lb of toffee.

1 cup unsalted butter
1 cup granulated sugar
Pinch of salt
Chocolate chips (room temperature)
Nuts

1. Take Parchment Paper and cover a cook sheet. This is where you will pour the toffee once cooked.

2. In a non stick pot, on medium heat melt butter and then add sugar. With a whisk, stir constantly. You do not need to stir fast, just keep stirring.
This is where I had my cute helper step in. It is nice to make someone else stir for a couple minutes!!


3. Stir until your candy thermometer is at about 285 degrees. It will start turning a brownish color.
4. Take and pour onto the parchment paper/cookie sheet. I will kind of drop tap the cookie sheet to spread it out. Don't try to spread it out with a spoon it will break the consistency.
5. After about 2 minutes take ONE chocolate chip and drop it on the corner.
If it DOES NOT SINK then it is perfect. Sprinkle the other chocolate chips on top.
If it DOES SINK then it is still to hot and wait about another minute.
Once the chips are sprinkled on the toffee, wait about 2-3 minutes for the toffee to  warm up the chips, and take a spatula (with PAM sprayed on it) and spread your chocolate layer over the toffee.
You can tell, our chips were from the fridge!! WOOPS!!
6. Sprinkle the Nuts on top (push into chocolate a little).

Put in The fridge for about 1 1/2 hours to chill. Then take out and break apart.


Don't forget to signup for my giveaway!

Tuesday, November 8, 2011

Making Front Page


For months I have seen many people making front page on etsy in the different teams I am a part of. Also, how happy they are when they make front page. The joy that is expressed to them from all of the team members is something that brings joy to people reading the comments and I am sure the person getting them. This is something I have been striving to do since opening (well, reopening) my etsy in May of this year. It is almost like a great honor to have your item proudly displayed on the front page for one hour so everyone can see it.

Well, yesterday this happened! My little row of 5 black/red/white owls made the front page of etsy. It is so funny, because yesterday was a total off day for me. My car broke down, had $200 auto bill, missed the Dr. appointment for the baby, was late picking up daughter from basketball, list goes on. When I found out I made front page, my entire day turned around.

Not only was I very happy for the sales, it was just a feeling like, I belong. I now feel validated that what I am doing is good enough. I feel like maybe I can make this into a business. I can do this for a living and be home with my children. I am good enough!

Thank you to all my fans and customers. It does make a huge difference that you appreciate my products. And thank you to Etsy team for picking a wonderful treasury that my beautiful owls were a part of.

Friday, November 4, 2011

My intimidating project!

So for the last month I have sat and wondered how easy it would be to use fuse-able interfacing?! Everyone at the fabric store has told me it is fun, and how it is so easy. However, it just intimidated me so much I have constantly set it aside. Until last night.


I got online and Googled how to use fuse-able interfacing and really got nothing. So instead I decided to just jump in there with some scrap material out of my bin and some shaky confidence. I will tell you what, it was a ball!!

I think it turned out rather cute!! Perfect to sew onto a onesie or hat. I think my son, Scott, will look very handsome in a white onesie sporting his new pilgrim hat. Here is how you do it.

I found this website and printed the pilgrim hat. Once you print the hat off, take your fuse interfacing and put it over the hat and trace it. I used Pellon Interfacing, so you would draw on the smooth side. The rough side of the interfacing is the side that lays on the fabric.

You will need to trace each piece separately (if you want different fabrics and illusion of depth).

Once you get the pieces all traced, plug your iron in and wait for it to warm up. This is when you dig into your scrap pile! I had fun finding all the neat fabrics that I had little pieces of.

Now you have the fabric you want, make sure the fabric is facing down. You want to put the rough side of the fuse interfacing on the back side of your fabric. Spray it with a few squirts from your spray bottle and hold your iron on it for about 10-12 seconds. I used the "cotton" setting on my iron. Do not slide the iron, you do not want to damage the interfacing.

The easiest of all is just cutting the pattern out now. Take the scraps and through it in your scrap bin (never known when it might com in handy) and then you will have all your pieces.

Now take all your pieces and put them together like a puzzle. Then you can sew the pieces onto each other.


VIOLA! You did it! Good job!!

Do not forget to enter my giveaway for the Snowman Owl! Great for a gift holder.

Thursday, November 3, 2011

Minions

Ready to ship!
I finished these last night and they are ready to ship out! So excited that the Christmas Snowmen Owls are getting done. Also these are the rest of my black/white/red collection owls! I think I might need to start making more!

So for today I am doing a giveaway. You will get one of the new Christmas Snowmen Owls:
How to enter:

1. Follow us on Facebook.
2. Follow this blog.
3. Comment below to show you have done this.
4. Love the owl! If you send a cute picture back of you loving your owl, that would be awsome!!

The giveaway end on November 20th, 2011.

GOOD LUCK!!!

Sunday, October 16, 2011

Zombie Apocalypse Santuary Party

When me and my siblings were younger my mother, who was a struggling single mother, would do really fun things with us. One was throwing themed parties around a movie. I remember when she took us all to the store and we each got to pick out one thing Dinosaur related, because we were going to watch "Land Before Time". This was a big deal for us!

So I have tried to carry on that tradition. I have done "Harry Potter" and "Lord of the Rings" weekend parties for us as a family.  Well, today is our "Zombie Apocalypse Sanctuary Party". This is for the new season of "The Walking Dead" on AMC. If you have not seen the series, YOU TOTALLY SHOULD!


We have started off by shopping for the necessary items, like fake eyeballs from the dollar store and rubber fingers! We found this nifty sign as well and decided to make good photo op of it! The fact Scotty (the baby) started fussing the same time I snapped the picture was priceless!!  Krystn, (the older, crazier one) loves to limp and drag around the house and pretend she is a zombie. She is a little dramatic, can you tell?

Here are some awsome picture of all the things we have made and the fun we are having!!
 Finger sausages!!
 Jello eyeball desert!
 Some dry ice and juice gives a great effect the kids love!!

 Tritip, mashed taters and red corn bread!
 Cute dinner! It was super good too!
 Someone was very happy! He even got his monster jammies on! Time to go watch The Walking Dead!